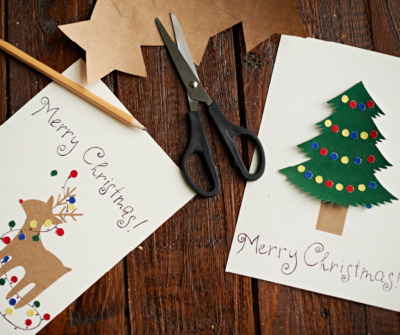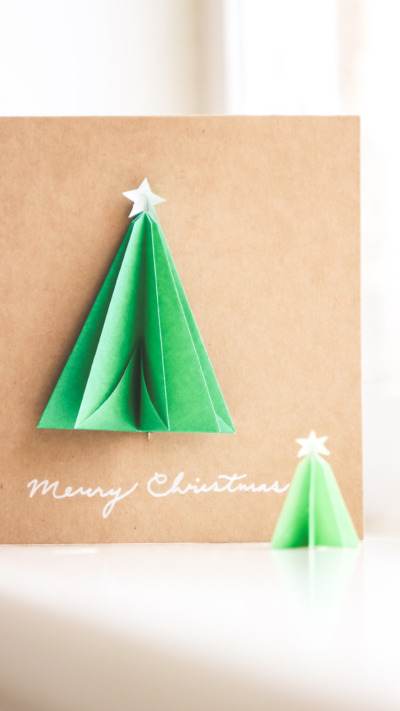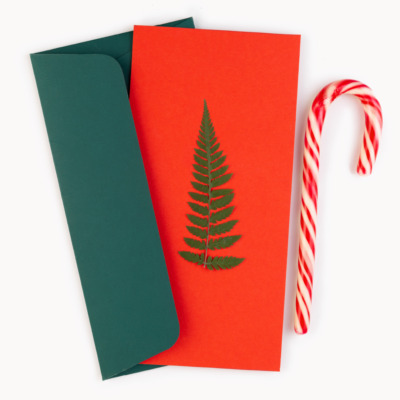
One of the most heartwarming thrills of the holidays is receiving Christmas cards from friends and family. Even better is when you receive a hand-crafted card you know someone took time to prepare themselves and customize for you. If you’re looking for inspiration for your own DIY Christmas cards this year, we’re ready to inspire you with 10 easy ideas to help your greeting cards stand out and share holiday cheer.
Whether you want to keep things simple with a classic holiday design or push the envelope with some unique embellishments, there’s a Christmas card idea on this list for everyone. So gather up your supplies, and let’s get crafty!

Collage Christmas cards
Collage Christmas cards are a wonderful way to personalize your greetings and show your loved ones how much you care.
Here are a few simple supplies you’ll need to get things started:
- A selection of holiday-themed photos or illustrations
- Scissors
- Glue or tape
- A blank card (or piece of cardstock)
- Optional: glitter, sequins, ribbons, etc.
With your materials in hand, begin by cutting out your images. If you’re using photos, you can either cut them into interesting shapes or simply leave them as rectangles. After you’ve cut out all your pieces, arrange them on your card the way you want.
Make sure to play around with the placement of your pieces until you’re happy with how they look. Take a step back and check out the overall design before you make any final decisions. Once the glue and glitter go on, there’s no going back.
Once you’re satisfied, begin gluing or taping your pictures to the card. If you’re using glitter or sequins, now’s the time to break them out. When you’ve got everything in place, give the glue time to dry completely before penning your message and mailing off your card.
See! With a little effort and creativity, it’s easy to whip up your own collage Christmas cards that are sure to impress everyone on your mailing list.
Pop-up Christmas cards

While a bit on the trickier side, pop-up Christmas cards can score you those “oohs” and “aahs” when they’re opened. Pop-up cards are a surefire way to put a smile on the faces of your nearest and dearest as they admire your handiwork. Here’s a step-by-step guide to crafting your own pop-up Christmas cards:
- Start with card stock, a pair of scissors, a pen or pencil, and some glue. You can also use decorative paper, ribbon, or other embellishments to make your cards really pop.
- Next, you’ll need to decide on the design of your card. Will you keep it simple with a single pop-up element or try something more complex with multiple layers? Sketch out your design beforehand, and then begin cutting out your card base and pop-up elements using the card stock.
- Now, you’ll want to assemble your card. Begin by folding your card base in half, then attach your pop-up elements to the inside of the card using glue or double-sided tape. Once your pop-ups are in place, decorate the outside of your card with whatever you like.
That’s it! Your pop-up Christmas cards are complete and ready to go in the mail, so they can wow your holiday crowd.
Homemade Christmas cards with stamps
Get ready to stamp it up! You can use stamps to create all sorts of magical holiday scenes and images. Even if you don’t have a ton of time, you can buy pre-stamped cards and then add your personal touches to make your cards shine.
Looking for inspiration? Here are a few favorite ideas for homemade Christmas cards with stamps:
- Create a scene: Use stamps to create a festive holiday scene on your card. You could have Santa’s sleigh soaring over a cityscape, snowmen trying to roast marshmallows, or children playing in the snow.
- Make it interactive: Add some stamps that the recipients can enjoy. For instance, you could add a “Scratch here” sticker with a hidden message under it or add a pop-up stamp to create a fun 3D effect.
- Use holiday symbols: Stamps are a great way to add traditional holiday symbols to your cards. Try using a star stamp to represent the Star of Bethlehem, a Christmas tree stamp for a holiday greeting, or a gingerbread man stamp for a more festive touch.
- Get personal: Use stamps to give your cards that personal touch that makes them truly special. One way to do that is to stamp your name or initials on the front of the card or by adding a special message on the inside.
- Go green: Save money and resources by using recycled materials for your cards. Recycled paper, old greeting cards, or even fabric scraps are all good ways to go green. If you’re feeling especially eco-friendly, you can always use stamps that are produced from recycled materials.
DIY Christmas watercolor cards
Watercolor cards are a beautiful and unique way to send the season’s greetings. Although they may seem daunting at first, with a little practice and a few simple supplies, you can easily make your watercolor cards at home.
To get rolling, you’ll need some basic supplies, including watercolors, a paintbrush, watercolor paper, and a cup of water. With your supplies collected, you can begin painting your designs on the paper.
Keep these things in mind when you’re painting with watercolors:
- First, start with a light touch and build up the color gradually. It’s always easier to apply more paint than it is to remove it.
- Second, be willing to experiment. Watercolors can be unpredictable, so go with the flow and see what happens.
- Once you have your basic design down, you can start adding the details. For example, if you’re painting a Christmas tree, dab on some sparkling lights or garland. If you’re painting a snowman, add a scarf, top hat, or pipe. Get creative—this is the holiday fun we pine for during the rest of the year!
- Satisfied with your design? Let the paint dry completely. Finish by signing your name at the bottom, like any great artist. Your watercolor Christmas card is now complete!
Quilled Christmas cards
Quilled Christmas cards are both beautiful and unique. This step-by-step guide will take you through how to make your own quilled cards at home using a few simple crafting supplies.
To kick things off, you’ll want paper quilling strips, a quilling tool, and glue. You can find all these supplies at your local craft store or online.
To create the quilled designs on your cards, start by coiling the paper strips around your quilling tool. Once you have a tight coil, slide it off of the tool and glue it in place on your card. Repeat the process until your card is covered in gorgeous, quilled designs.
After your quilled designs have dried, add any other embellishments you like. Some ideas include adding ribbons, sequins, or beads. You’ll amaze friends and family alike with your beautifully handcrafted quilled Christmas cards. Just watch—these unique cards may become the standard they compare all other cards against.
Ribbon Christmas cards
Perhaps the most popular trend in handmade Christmas cards is the use of ribbon. There are so many ways to use ribbons to create beautiful, unique cards. If you’re looking for inspiration, we’ve got some great ideas for ribbon Christmas cards below.
For a simple and elegant card, try tying a piece of ribbon around a blank card. You can use any color or type of ribbon that strikes your fancy and experiment with different knots or bow styles. This is also a terrific way to use up scraps of ribbon you might have around the house.
Want to get more creative? Use your ribbons to create all sorts of different shapes and patterns on your cards. Try using ribbons of different colors and widths to create stripes, plaids, or polka dots. You could also cut out shapes made from ribbon and glue them onto your card to get a cool 3D effect.
Ribbons also make great embellishments for other handmade cards. Try using them to decorate a card’s edges or to create a fancy border around any photo or sentiment. You can also use them to make festive streamers or banners.
Recycled Christmas card-making
Making recycled Christmas cards is a fun and easy way to create something special for everyone in your circle this holiday season. Plus, it’s a great way to teach kids about recycling and upcycling!
Here’s the lowdown on a few easy ideas for making recycled Christmas cards:
- Use recycled paper or cardboard to craft your own homemade Christmas cards. Anything will work—old magazines, newspapers, wrapping paper, or even recycled envelopes! Simply cut or tear the paper into pieces and glue or tape them onto your card base.
- Get creative with recycled materials! Feel free to use buttons, ribbons, fabric scraps, old jewelry, or even dried fruit or seeds to decorate your cards.
- If you’re feeling super crafty this season, you can even make your own recycled paper! Just shred some old paper and soak it in water overnight. Afterward, run it through a paper-making machine (or, if you don’t have one, a pasta machine will work in a pinch), and voila! You’ve got recycled paper to use for your Christmas cards.
- Don’t forget the inside of your card! Write a festive message or include a family photo to spruce up your holiday greetings.
Laser-cut Christmas cards

It’s time to get high-tech! Combine creativity with cutting-edge technology to create a stunning laser-cut Christmas card that will take your cards to the next level. If you’re unsure where to begin, we have a few suggestions to get you started.
A popular trend in laser-cut cards is to create a negative space design. This is where you trim away parts of the card to create a design or image. Negative space cards can be simple or intricate, depending on your skill level.
For a more traditional laser-cut card, a winter scene is always a winner. There are so many beautiful winter images that would look exquisite cut out of a card. Snowflakes, trees, and even reindeer make beautiful laser-cut Christmas cards.
You could always incorporate a photo into your design if you’d like to add a more personal touch to your card. This is a great way to make a laser-cut card that is truly unique. You could even add a message or holiday greeting to the inside of the card using your laser cutter.
No matter what design you choose, laser-cut Christmas cards will make an impression.
Embroidered Christmas cards
Embroidered Christmas cards provide a lovely way to show your loved ones how much you care this holiday season! Here’s a step-by-step guide to help you make your beautiful homemade cards:
- Gather your supplies. You’ll need cardstock, embroidery floss, a needle, and scissors. You can also add embellishments like beads or sequins to make your cards even more appealing and personalized.
- Cut your cardstock to the size and shape you want, then use a pencil to sketch out your design on the front of the card.
- Embroider away! Use a simple stitch, like a chain or running stitch, to create your design. If you’re unsure how to do a particular stitch, there are plenty of tutorials online or in embroidery books.
- Finish off your design by trimming away any excess thread. Sign and date the back of the card so your loved ones know who sent it!
Embroidered Christmas cards are a thoughtful and special way to show someone you care. This holiday season, why not give it a try?
Christmas cards using vinyl letters
Looking for a way to make an impression that sticks? Why not try using vinyl letters?
This project is easy and relatively inexpensive, and the results are sensational. You can also use up those scraps of vinyl left over from other projects.
Here’s what you’ll need:
- Vinyl letters (you can find these at most craft stores)
- Scissors
- Cardstock
- Pen or pencil
- Ruler
- Double-sided tape
First, start by planning out your design. It’s helpful to lay out the vinyl letters on a piece of scrap paper first until you get the spacing and placement just right. When you’re happy with your design, cut out the letters with scissors.
Next, trace your letters onto the cardstock. Use a pencil or pen that won’t show through the paper. Once your letters are traced, carefully cut them out too.
Now it’s time to attach the vinyl letters to the cardstock. You can do this with double-sided tape or try a slightly dampened sponge to apply pressure and adhere to the letters.
To give it that extra special touch, you can add a message inside the card using a metallic sharpie or by attaching a small piece of ribbon.
Show off your creativity this holiday season
When you send out Christmas cards, you’re doing so much more than mailing a letter. You’re maintaining those close connections that matter most, building heartfelt relationships that last, and sharing your affection with those you love most during this special time of the year.
To show you how much we appreciate you, here’s an extra. To give your stationery added zest, add a drop or two of your favorite essential oil or personal oil blend to your hands as you write your holiday cards. Use this hands-on tip to give your cards a festive aroma and make the season scented and bright!
The post DIY Christmas cards: 10 easy ideas for a personalized holiday greeting appeared first on Young Living Blog – US EN.
